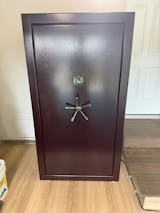
Owning a Liberty Safe is essential to protecting your valuables, and maintaining it properly ensures it remains secure and functional. One often-overlooked maintenance task is replacing the safe's battery. In this guide, we’ll walk you through everything you need to know about changing your Liberty Safe’s battery to keep it working seamlessly.
Why Is Changing Your Gun Safes Battery Important?
Unless you've opted for a mechanical lock, the electronic lock on your Liberty Safe relies on a battery to function. If the battery dies, you could be locked out, causing stress and inconvenience. Proactively replacing the battery ensures that your Liberty Safe remains accessible and reliable. Additionally, a fresh Duracell 9V battery ensures consistent lock performance and avoids accidental lockouts caused by low power.
What if I let my battery die? Am I Permanently locked out?
You're not permanently locked out if you let your safe battery die. Liberty Safes are configured to store the combination inside the lock, and as soon as you replace the battery, you should be able to use the code you set when you received the safe.
When Should You Replace Your Safe Battery?
A good rule of thumb is to replace your Liberty Safe battery annually, even if the existing battery seems to be working fine. This practice helps you avoid unexpected lockouts and ensures your safe operates at peak performance. Consider setting a recurring reminder in your calendar for a specific date each year. Many people choose an easy-to-remember date like the start of daylight-saving time or the beginning of a new year.
Some Liberty Safes have low-battery indicators, such as a beeping sound or a flashing light. While these alerts are helpful, please don’t wait for them to change your battery. Treat these as a backup warning rather than your primary indicator for maintenance.
What You’ll Need to Replace the Battery
Before you get started, gather the following tools and materials:
- A replacement Duracell 9-volt battery.
- A soft cloth to clean any dust or residue from the battery contacts.
Using high-quality, brand-name batteries is crucial. Cheap or expired batteries may not provide reliable performance, and rechargeable batteries are typically not recommended for safes as they can lose charge unpredictably.
Step-by-Step Guide to Replacing Your Safe Battery
For complete instructions for your safe model, visit https://www.libertysafe.com/pages/operating-your-lock.
- Open the Safe and Engage the Lock: Always work with the door open in case of any issues.
- Locate the Battery Compartment: Most Liberty Safes have the battery compartment on the bottom or side of the keypad.
- Access the Compartment: If the compartment is on the keypad, it may have a sliding cover or require you to pull it away from the safe’s surface gently.
- Remove the Old Battery: Carefully disconnect the old battery by detaching it from the terminals or removing it from the battery tray.
- Inspect and Clean the Battery Contacts: Check the battery contacts for any dirt or corrosion. Use a soft cloth to clean the contacts, ensuring a solid connection for the new battery.
- Install the New Battery: Insert the new battery, ensuring the terminals align correctly with the connectors. Double-check the polarity (positive and negative ends) to avoid installation errors.
- Test the Safe: Once the new battery is in place, test the lock by entering your code to ensure the keypad and locking mechanism function properly. If the safe doesn’t respond, recheck the battery placement and connections.
- Secure the Battery Compartment: Close the battery compartment securely, whether by snapping the cover back in place or tightening screws if applicable.
Tips for Prolonging Battery Life
- Use High-Quality Batteries: Always opt for premium, name-brand batteries to ensure long-lasting performance.
- Avoid Rechargeable Batteries: These can lose charge unpredictably, and Liberty Safe doesn't recommend them.
- Store Batteries Properly: Keep spare batteries in a cool, dry place to maintain their shelf life.
- Check Battery Expiration Dates: Ensure the battery you’re installing isn’t close to its expiration.
Setting a Reminder to Replace Your Battery
One of the most effective ways to ensure timely battery replacement is by setting a recurring reminder. Here are some tips:
- Choose a Significant Date: Pick a memorable date like your birthday, New Year’s Day, or an annual holiday.
- Use Technology: Set a yearly alarm or calendar notification on your smartphone or computer.
- Write It Down: Keep a maintenance log for your Liberty Safe, noting the date of the last battery change.
What to Do if Your Safe Doesn’t Work After Changing the Battery
If your Liberty Safe doesn’t respond after installing a new battery, try the following troubleshooting steps:
- Double-check the Battery: Ensure it’s installed correctly and the terminals are properly aligned.
- Inspect the Connections: Check for loose or damaged wires in the battery compartment.
- Test a Different Battery: The new battery could be faulty; try another one from a trusted brand.
- Contact Customer Support: If all else fails, contact Liberty Safe for assistance.
Changing your Liberty Safe’s battery is a simple but crucial task that ensures the reliability and longevity of your safe. You can avoid unexpected lockouts and keep your valuables secure by replacing the battery annually, using high-quality batteries, and following proper maintenance practices. Mark your calendar today and make safe maintenance a part of your routine. Your future self will thank you!
*Made in the U.S.A. from U.S. and Global Parts.


