In the past couple of years, tens of millions of new shooters have joined the ranks of gun enthusiasts. The reasons are many and varied, but the bottom line is, you probably know someone who has recently gotten into the gun world and who wants and needs good firearms instruction.
Whether or not you are the right person to teach new shooters the basics and help them progress in their skills and enjoyment of shooting, well, that’s another question (see below for a discussion on that point). But there are some do’s and don’ts for teaching new shooters that are applicable whether you’re a firearms training professional or just a regular guy or girl teaching your friends or kids to shoot.
Let's start with some basic questions and answers, and then we'll get to the do’s and don'ts of teaching new shooters.
Table of Contents
- Should you even try to teach someone to shoot?
- Is it too early for me to teach my child to shoot?
- Are women better students than men where learning to shoot is concerned?
- Do keep sessions brief and know when to call it a day.
- Teaching new shooters about the importance of a quality gun safe is a great idea.
IMPORTANT NOTE: This is not intended to be an exhaustive manual for instructing a new shooter, but rather some primary things to take into consideration. This article is for informational purposes only, and Liberty Safe assumes no liability for the use or misuse of this information. The reader takes full responsibility for the safe and responsible use of firearms and acknowledges that ideally, everyone should seek professional firearms instruction.
Should you even try to teach someone to shoot?
Teaching children basic gun safety is (we feel) the responsibility of every parent, even if you don't shoot or own guns. Whether you wish to teach your children to shoot is a personal decision, but if professional instruction is not available or desired, then a knowledgeable and experienced parent teaching a child to handle firearms safely and shoot them in a safe, responsible manner is entirely appropriate, assuming the child is mature enough to understand and follow instructions.
For adults, it's a good idea to seek professional firearms instruction. This has dual benefits. First, a professional instructor with experience teaching new shooters will likely cover aspects you may not have considered, even if you're a very experienced shooter and are known in your circle of friends as a gun guy or girl (perhaps because of that fact).
Secondly, when you hand over the instructional authority to someone the student doesn't know personally, the student may be more willing to accept correction and won't potentially take constructive criticism personally, and will progress more quickly and safely.
If you find your child, friend, wife, husband, or significant other tends to get stressed out when you attempt to provide instruction or correction, it is a good idea to seek the help of a professional to avoid the emotional baggage that can hamper a positive learning experience and turn a fun session at the range into a chore.
Bottom line: Ideally, get an experienced teacher to help. Not just an experienced shooter. Someone with experience instructing new shooters. However, if you have friends or kids who want you to help them learn to shoot and you feel capable of doing so, look at the do’s and don’ts below.
Is it too early for me to teach my child to shoot?
This is a question that only you can answer and depends on your situation, and upon each child's individual capacity to understand and follow important instructions. Please note: this is not a criticism or judgment of your child. Objectively, some kids are interested earlier than others, and some kids are capable of safely handling and shooting guns earlier than others. Some adults still can't.
Some children may be ready to be taught to shoot as early as age 3 with constant parental supervision and hands-on assistance, and some people may not yet be ready at age 16 or 17. If you decide to teach your child to shoot, you need to remove parental pride from the equation and objectively evaluate whether your child can listen and follow instructions effectively during a potentially very dangerous activity.
Are women better students than men where learning to shoot is concerned?
It's tempting to say yes to this question because it's the click-bait answer. But the truth is both men and women can be taught to shoot with equal skill. The key factor is how well they are willing to listen and put aside any preconceived notions or bad habits.
American culture generally thinks of shooting guns and hunting as a male activity; traditionally, boys play with toy guns and make up shooting-type games with their friends than girls. This is changing somewhat but is still primarily the case.
This may lead you to believe that boys and men may be inherently more capable as new shooters, but we’ve found the opposite more common. We've taught many new female shooters who shot better than their experienced shooter husbands or boyfriends did on the same day using the same gun precisely because these girls and women didn’t have any preconceived notions or societal pressures to know how to shoot, and they listened to and followed directions better.
In addition, playing with toy guns and other non-firearm devices with triggers can actually create bad habits and poor trigger control because they don’t behave like actual guns. Someone who has grown up playing with toy guns might have a harder time learning the fundamentals of trigger control than someone who starts completely from scratch.
The key point here, though, is that anyone who is a good listener accepts instruction, practices the fundamentals, and puts aside any ego they may bring to the equation can learn to shoot well.
Now that we’ve reviewed some important considerations before teaching a new shooter let’s get into the do’s and don’ts.
Do teach new shooters to understand and practice the four rules of gun safety
There’s surprisingly a lot of debate about the right rules to teach and the right way to phrase/teach them, but the key points to emphasize here are:
- Treat all guns as if they’re loaded unless you personally, immediately, and visually verify otherwise.
- Never allow the muzzle or barrel of any gun to point at anything you are not willing to shoot and destroy. This includes the shooter's legs, feet, hands, or other people.
- Keep your finger off the trigger and outside the trigger guard until your sights are on the target and you are ready to shoot.
- Be sure of your target and what is behind it. For example, don’t shoot at a target on the crest of a hill, as you have no idea where that bullet will go.
Video: Four Rules of Firearms Safety
Suppose your new shooter breaks one or more of the rules. In that case, we recommend you shut down the teaching session for the day, explain what the student did wrong, compliment him or her on the good work for the day, and set up another teaching session at another time and review the rules beforehand again. This helps new shooters see the importance of the four rules.
There are more rules and concepts to understand when using firearms, and you may want to go over these additional firearm safety rules during your coaching when appropriate.
Do double up on properly fitting ear protection
Of course, you should always use appropriate eye protection when you’re shooting or are at a location where others are shooting. Ear protection is also necessary, whether appropriately fitting earplugs or over-ear shooting muffs.
And here’s an important tip where new shooters are concerned: the gunshot noise is often the most stressful part of learning to shoot. Especially if you are coaching a new shooter at an indoor range, using in-ear plugs and over-the-ear shooting earmuffs is a good idea. Electronic muffs that magnify ambient sounds (like talking) and automatically cut out for high-decibel noises (like gunshots) can make things much easier, especially when doubling up.
Quality shooting muffs will seal the areas around the temples of the shooter’s eye protection, and some of the cheaper ones will not, particularly on smaller heads with adult-sized shooting glasses. So be sure to watch for this. If the muffs’ pads aren’t sealing properly, more noise will make it to the shooter’s ear.
Do teach new shooters at a location with minimal distractions and noise
Depending on your location and preference, you might use a formal indoor shooting range, an established outdoor range, or somewhere in the boonies to teach a new shooter. A very busy and noisy indoor range can be intimidating and confusing, making it difficult for the new shooter to hear your important instructions. Try to schedule a private session or visit the range at a time when you’re likely to be alone.
If you are outdoors, ensure you have a safe backstop, shoot legally, and always clean up your mess.
Do start with an appropriate firearm
If your new shooter just wants to learn to shoot a gun, we strongly recommend starting with a light-recoiling .22 caliber or pellet rifle. For several reasons, an appropriately sized single-shot break-action or bolt action is a great starter rifle for both youth and adult shooters. The safety factor of a single shot is a plus, and the simple manual of arms is easier to learn. In addition, a rifle is inherently easier to hit a target with than a handgun because there are four points of contact with the shooter (the shoulder, the cheekbone, and both hands) to keep the gun steady and the sights aligned properly on the target.
Depending on the shooter’s size, strength, and other factors, starting with a larger/faster rifle caliber may be appropriate, but avoid shooting high-powered, hard-recoiling, intensely noisy rifles at first. The noise and concussion factor of high-powered rifles fired indoors can hardly be overstated. If you have access to a suppressor and they are legal in your area, this can help a lot with new shooters.
Handgun: if your new shooter specifically wants to learn how to shoot a handgun, ideally start with a light-recoiling pistol or revolver in .22 caliber, though for adults, it can be appropriate to start with a full-size revolver in a caliber like .38 Special or a service-sized pistol in 9mm Parabellum, depending on the shooter’s size, hand strength, and maturity level.
Don't start with tiny pocket-sized .380s/9mms or the smaller revolvers (such as J-frame S&W revolvers or Ruger’s LCR series. They are generally very unpleasant to shoot, can contribute to shooters developing a flinch, or can even cause injury to the inexperienced, and should be considered expert guns.
Shotgun: Fit is key here, so we recommend consulting a trained shotgun instructor. However, you generally don’t want to start a new shotgun shooter with a light, hard-recoiling 12 gauge. You also don’t want to start them off with a .410 (which makes it much more difficult to hit flying targets). A moderately sized, gas-operated 20 gauge that is heavy enough to absorb recoil but light enough for the shooter to manage safely may be the ideal choice here.
Do start with the basic fundamentals of shooting
With some variations depending on whether you’re teaching the use of a handgun, long gun, shotgun, or rifle, there are some basics of shooting that, when mastered, will contribute to success.
Stance
Generally, the student should stand with feet comfortably shoulder-width apart, with the non-dominant-side foot slightly forward and that knee facing the target. Weight will be slightly forward in an athletic stance, with most of the shooter’s weight on the balls of the feet rather than the heels.
Grip
There are specifics based on whether you’re teaching handgun, shotgun, or rifle shooting, but the basics are:
- Handgun: grip the gun as high as possible with your strong/dominant hand, and keep the trigger finger straight alongside the slide or frame until you’re ready to shoot. The non-dominant hand is placed so the top edge of the index finger is in contact with the bottom of the trigger guard, and then that hand grips the handgun firmly. The strong-hand thumb can be lifted up and pointed toward the target, or it can be locked down on top of the non-dominant thumb. Most modern handgun instructors teach the thumbs-forward method. For revolvers, the non-dominant thumb may be placed across the back of the dominant grip if desired--though smaller-handed shooters will have difficulty with this; for semi-autos, this will cause a painful injury as the slide or bolt reciprocates as the pistol is fired.
Note: For dynamic pistol shooting, you generally want to grip the gun as hard as you can without it shaking and without impeding the free movement of the trigger finger.
- Rifle: the buttstock is placed firmly on the dominant-eye-side shoulder, just inward of the pocket. The dominant side hand is generally* placed around the grip, and the trigger finger is kept outside the trigger guard until ready to fire. The non-dominant-side hand is placed comfortably on the forend (for standing shots) or may be placed under the rear of the buttstock to support and adjust elevation (for bench rest or some types of prone shooting). The cheekbone is placed on the comb or riser of the buttstock to align the dominant eye with the sights or scope.
Note: For bench rest or long-range rifle shooting, the dominant-side (shooting hand) grip might be kept very light, with the thumb not wrapped around the grip but rather kept on the same side as the shooting hand to avoid disturbing the sight picture with too much stock input.
- Shotgun: the buttstock is placed firmly on the dominant-eye-side shoulder, just inward of the pocket. The shooting hand is placed around the grip without the thumb locked aggressively over the top but rather with the forearm, wrist, and trigger finger aligned along the side of the stock, and the trigger finger kept outside the trigger guard until ready to fire. This is difficult to describe, so check out this excellent video from shotgun shooting expert instructor Gil Ash. The non-dominant-side hand is placed comfortably on the forend, and the non-dominant index finger may be kept aligned along the forend or barrel to help point the gun at the target and keep the hand and forearm muscles relaxed. The cheekbone is placed on the comb or riser of the buttstock to align the dominant eye directly behind the rib or receiver.
Video: Gripping the Shotgun the Right Way
Sight alignment/sight picture
There will be a rear sight with a notch and a front sight post for typical handguns without optical/red dot sights and many rifles. Sight alignment refers to the process of aligning the front sight post or bead in the rear sight notch, with equal space to either side of the front sight and with the tops of the front and rear sights aligned. There are exceptions for buckhorn-type rifle sights and others, but these are the basics.
For aperture or peep-type sights with a rear circular opening and a front sight post, the shooter will look through the rear sight and align the top of the front post in the center of the hole in the rear sight. Proper gun fit is key here.
Sight picture is the process of taking that sight alignment and placing it so the front sight is in the center of the desired target while still keeping proper sight alignment.
Most instructors teach students to focus hard on the front sight, while the rear sight and the target will be slightly blurry.
Red dot sights are preferred for new shooters, as they have only one focal plane, and the shooter can maintain focus on the target and simply align the dot. We recommend starting new shooters on guns equipped with red dot optical sights (see more below).
For magnified telescopic sights, the focus should ideally be adjusted so both the target and the reticle/crosshairs are in focus to the shooter’s eye.
The proper shotgun sight picture for aerial targets is very controversial, and we recommend getting professional instruction here. Some instructors teach that a shotgun shooter shouldn’t even notice or see the sights or rib on a shotgun but rather focus on the target and point the gun rather than aiming the gun. In contrast, others insist that lining up the front bead with the rear of the receiver and the shooter's eye is essential for success. For a new shotgunner learning to hit pasture clays, it’s probably a good idea to ask them to align the front bead on or just below the clay target and break the shot. Professional instruction will alleviate a lot of frustration for a newer shooter for skeet and other high-speed shotgun disciplines, particularly ones focusing on quartering or crossing shots.
Trigger control
Instructors vary in their approach here, but the bottom line is you want to teach a new shooter to press the trigger to the rear in such a way as to not disturb the sight picture. We recommend dry firing at least a few times so the shooter gets familiar with how the trigger break feels, and this should be done without regard to the sight picture or sight alignment. Once they can break the shot cleanly without moving the muzzle of the gun as the sear or striker releases, then you can start working on trigger control while maintaining proper sight alignment and sight picture.
You can teach press, press, press, break or squeeze or take out the slop and then break the shot or move the trigger straight to the rear or whatever works for you and your new shooter, but as long as the bullet goes where the sights are aligned, that’s the key thing at first. You’re focusing on success here and establishing good habits.
Note: don’t get wedded to slowly pressing the trigger and looking for a surprise break if you want the new shooter to be able to progress quickly to a dynamic pistol or rifle shooting, though this technique is fine for bullseye-type shooting. Similarly, for shotguns shooting aerial targets, the trigger pull will necessarily be a quick snap and is much different from shooting a handgun or rifle for utmost accuracy.
Breath control
For static, target shooting, generally, it’s a good idea to teach students to take a breath, let it out, and try to break the shot at the natural respiratory pause just before taking another breath. This is particularly important for benchrest or slung/prone rifle shooting and bullseye-type handgun shooting. For dynamic pistol or rifle shooting, breath control basically means you keep breathing naturally. For more precise handgun shots at longer ranges, you may need to hold half a breath or wait for the respiratory pause, but this is a more advanced concept and generally not needed when instructing new shooters.
Sometimes new shooters tend to hold their breath due to tension or anxiety, so remember to watch for relaxed breathing and help them breathe appropriately to keep the brain and muscles well-oxygenated and release tension.
Video: Control Your Breathing for a Precise Shot – Pro Tip
Follow-through
This is very important in all shooting, but it will look and feel slightly different depending on the shooting discipline. The concept of follow-through is maintaining pressure on the trigger and proper sight alignment until the shot breaks and after to avoid disturbing the gun before the projectile leaves the barrel. For shotgunning, follow-through includes continuing the barrel swing after breaking the shot rather than stopping your swing. For dynamic handgun or rifle shooting, follow-through includes riding the recoil, reacquiring your sight picture, and preparing the trigger to break the next shot.
There are many concepts that more experienced shooters will need to learn, including those specializing in a particular discipline, such as long-range rifle shooting, dynamic/practical hand gunning, or various shotgun sports. For these, it’s a good idea to get professional training.
Some of these include, but are not limited to:
- Finding your natural point of aim
- Shooting rifles during the respiratory pause
- Push-pull technique for a combat shotgun
- Drawing and presenting a handgun from a holster
- Tactical and emergency reloads
- Clearing malfunctions
- Establishing proper shotgun lead on aerial targets
Do focus on results rather than being a zealot for a particular technique
Results-focused teaching means that if your shooter is safely, accurately, and repeatedly hitting the target, that’s the key thing to focus on (and praise). You may feel strongly about a particular handgun grip or trigger technique, but results are what matter here. Even among championship-level shooters, there is wide disagreement over the best way to perform many of the actions involved in shooting. So focus on the results.
If your shooter is trying something very unorthodox or something that you see may potentially cause other issues down the road, you can say things like if you want to try something different, do X and see how it works for you or you’ll eventually be able to shoot more quickly if you try X. But let the shooter decide what grip/trigger press/sight technique/etc. feels best and works best for him/her initially, particularly if no safety rules are broken and the target shows good results.
Do pay attention to a new shooter’s eye dominance
Most people who aren’t shooters have never even heard of eye dominance, and it rarely comes into play unless you’re involved in shooting, photography, or certain sports activities requiring the use of your dominant eye. Here’s a simple test to check eye dominance.
Although research has shown that the odds of a right-handed person being right-eye dominant are approximately 2.5 times greater than the odds of that person being left-eye dominant — it is impossible to predict eye dominance based on handedness alone, and you should check the eye dominance of all new shooters. While the majority will be right-handed and right-eye dominant, some will be cross-dominant (right-handed but left-eye dominant, or left-handed but right-eye dominant).
Learning to shoot long guns (rifles and shotguns) is one activity where the student will have a much easier time learning and progressing if the instructor places the butt of the firearm against the shoulder next to the student’s dominant eye--even if they are cross-dominant. This is because it is usually preferable and more natural for new shooters to line up the firearms with their dominant eye, even if shooting from their off-shoulder initially feels strange.
This is more important with long guns (rifles and shotguns) than it is with handguns since lining up handgun sights with a cross-dominant eye is a fairly simple matter of turning one’s head to the left or right a few degrees and/or shifting the handgun over an inch or two in space.
The student will determine the choice and also by the instructor’s evaluation of safety and learning progress using the selected side. If you try one side for a while and it still doesn’t feel right, and you’re not getting the desired results, have the student switch to the other eye/shoulder and see how they progress.
Please note: while some people are strongly right-eye dominant or strongly left-eye dominant, others seem to be able to adjust to the primary use of either eye for shooting. Suppose a shooter doesn’t seem to display any particular preference or improved ability when favoring a particular eye. In that case, it is typically preferable to teach them to shoot using their dominant hand as the primary (right-handed people would grip the handgun/shotgun/rifle and manipulate the trigger with their right hand).
Do use a shooting bench and rest/shooting bags
Particularly for younger shooters, getting early success in hitting a target is key. If you have them start from a shooting table or bench with a rifle supported by sandbags/shooting bags or other rest, you’ll see more smiles and success than if you start them out shooting standing/offhand.
Do use a non-magnified red dot optical sight for new shooters
Iron-sighted handguns and rifles require three focal planes to be managed by the shooter: the rear sight, the front sight, and the target. It’s difficult and complicated to manage all three planes while also paying attention to stance, trigger control, safety, and all the other things a new shooter needs to focus on.
A 1X red dot optical sight is designed to be largely parallax-free so the shooter can maintain a target focus, and the dot will simply appear on the target where the bullet will impact. This is much easier, and new shooters will likely see greater success earlier than when they started with more complicated iron sights (or telescopic sights).
Another advantage of red dot sights is that they obscure far less of the target and the area below it than iron sights, improving situational awareness.
Do start with reactive targets when possible
A reactive target makes noise, explodes, or moves when hit, and for most new shooters, it’s much more satisfying to shoot these targets than boring paper bullseyes.
In an indoor range, using reactive targets may not be possible, but you can select shoot’n-see type paper targets so shooters can more easily see their shooting results.
In an unrestricted outdoor setting, eggs, fruit, large lollipops stuck into a board, biodegradable clay targets, and diet store-brand soda jugs and cans are all excellent fun to shoot. Just make sure always to clean up your mess. Don’t shoot glass, computer monitors, TVs, machinery, appliances, or other similar items.
Don’t shoot into railroad ties, tires, tree trunks/stumps, concrete, mild steel targets, or similar backstops
All of these materials can send bullets or fragments back at the shooter. Not good.
Don’t ever hand a new shooter a hard-recoiling firearm as a joke
YouTube is rife with idiots who convince their unsuspecting, inexperienced girlfriends or children to try shooting 12-gauge magnum slugs, dangerous game rifles, or large magnum handguns, so everyone can laugh and mock the shooter who is (at best) terrified and likely injured by the experience.
Don’t be that guy.
Literally, nothing good can come of it. A new shooter in this situation will only learn not to trust you and likely develop a bad flinch that will take a lot of work to ameliorate.
If interested students ask you to let them try out a more heavy-recoiling firearm, be sure to work up to it in increments and provide safe and steady support for the shooter.
Do give a lot of positive reinforcement and compliments
Even if your new shooter isn’t doing as well as you hoped or expected, find something positive to say and give frequent compliments. The more positive aspects you see and comment on, the better the experience will be for new shooters, and the more likely they will want to continue in the sport.
Do keep sessions brief and know when to call it a day
It may be fun and fulfilling for you to teach new shooters, and it might be an activity you could do all day without getting tired or overwhelmed. However, remember that all of this is new information for your new shooters. They may be having trouble comprehending concepts or instructions that you have taken for granted for years and are second nature to you.
It's a good idea to regularly ask new shooters if they are tired, bored, thirsty, overwhelmed, or if they otherwise want a break, or to call it a day. This is particularly important if you're working on live-fire exercises. If you notice a drop in their concentration, or if they even come close to breaking those vitally important four gun safety rules, let them know that you're going to end the instruction session for the day, compliment them for their great work, and leave it for next time.
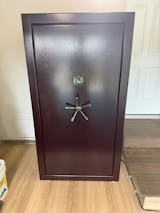
Teaching new shooters about the importance of a quality gun safe is a great idea
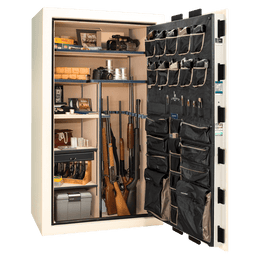
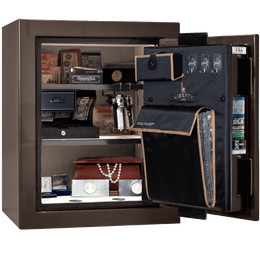
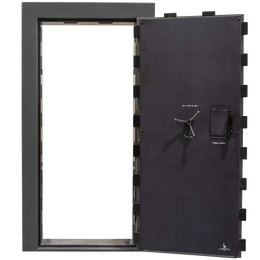
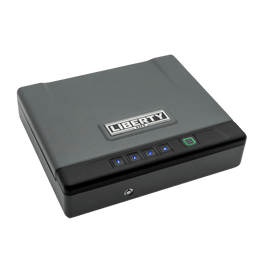
Keeping firearms secure when not in use is the responsibility of every gun enthusiast, and this is something that should be taught to all shooters. Of course, we recommend you purchase the best-quality Liberty Safe you can afford. Check out our range of USA-made gun safes and handgun vaults.
*Made in the U.S.A. from U.S. and Global Parts.


